
How To Make Customized Cricut Classroom Signs At Home?
There are many things you can do with a Cricut machine. In the same way, you can also use your Cricut machine to make Cricut classroom signs. This blog will explain the step-by-step process of making classroom signs with your Cricut machine. You can make many ideas for the classroom, which we will discuss in this blog. But for the tutorial, we have explained the easiest Cricut classroom signs to make. So let us start with the blog by telling you what material you will need to make a customized Cricut classroom signs.
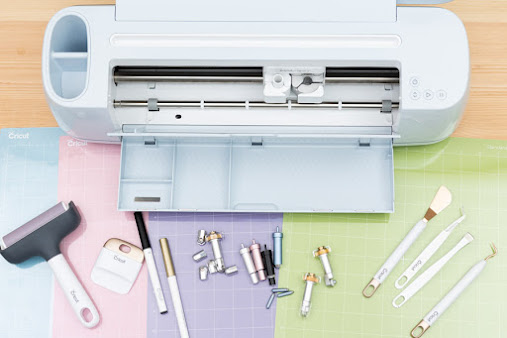
Materials Required To Make
Cricut Classroom Signs
Here is the list
of materials you will require to make Cricut Classroom Signs at home:
●
Masking Tape
●
Acrylic Paint Brushes &
Paint
●
Wooden Signs
●
Cricut Joy Transfer Tape
●
Cricut Joy Smart Vinyl
(Permanent)
●
Cricut Joy or Any Cricut
machine
Step By Step Process To Make
Classroom Signs With Your Cricut
- Use acrylic paint for painting your colors of choice. It will be very easy for you to paint if the wood material is rough. For using the pencil, you can take the help of the masking material to get clear lines while painting. You just have to ensure that the paint is fully dry before removing the tape. You can paint as many coats as 2-3 coats, depending upon the color texture you want to achieve.
- Insert the smart vinyl in your Cricut machine; there is no need
for a mat if you’re using smart vinyl. Follow the on-screen instructions
to cut the design.

- Now unload the vinyl sheet and watchfully remove the excessive vinyl, only leaving the letters behind.
- After that, apply the transfer tape to your words, pressing it hard with the help of a scraper tool, or you can use any other flat/ plain surface to stick the tape completely.
- Watchfully remove the white backing of your words.
- Apply your words on the sign, with the help of a scraper tool
or any other flat surface to strongly press and attach the words on the
sign. And also, watchfully remove the transfer tape as well.

8. Finally,
you’re done with the process; all you need to do is just attach some string or
any image at the back of your sign, and then it is all ready to be displayed in
your classroom.
Final Words
In this blog, we
have explained the step-by-step process for making Cricut classroom signs. We
hope we have cleared all your doubts. Please refer to our Frequently Asked
Questions if you have any doubts left.
Frequently Asked Questions
How can we make custom signs
using a Cricut?
You can make
custom signs with Cricut using these 8 steps, which are as follows:
●
Step 1: Collect all your supply
materials.
●
Step 2: Make your design
●
Step 3: Cut your Design
●
Step 4: Weed your design
●
Step 5: Make a piece of wood
●
Step 6: Transfer your desired
quote to the design.
●
Step 7: Prevent the paint from
dripping.
●
Step 8: Paint it.
What materials do you need to
make signs with Cricut?
You can make
wooden signs using your Cricut machine in many different ways. You can use
materials like stencils, adhesive vinyl, and iron for painting over the
signs.
What things can we make for
the classroom using the Cricut machine
Following are
some of the project ideas you can try making for your classroom using the
Cricut machine:
●
You can make pillows for the
reading center.
●
Create a goal tracker sheet.
●
Organizing the supplies with
the help of a table.
●
Labelling of binders and book
bins.
●
Creating an easy-to-use entry/
exit tracker.
●
Labelling backpack and cubbies
hook.
●
Decorating the back wall, front
door, and bulletin board.
Which Cricut machine is best
for making signs?
You can make signs with any Cricut machine. But the best Cricut machines are Cricut Explore 3 and Cricut Maker 3.


Comments
Post a Comment